
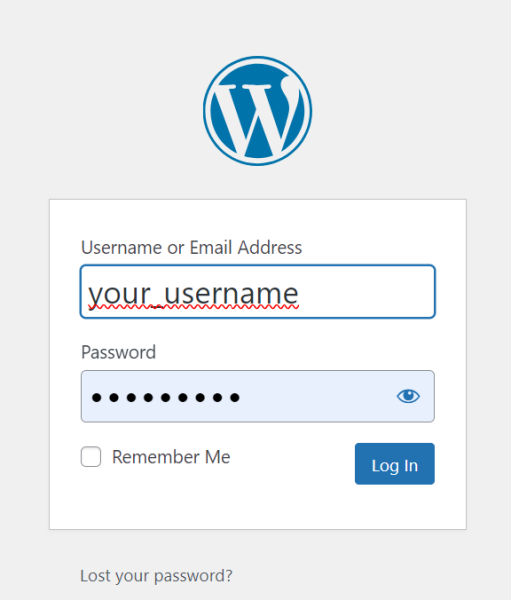
Site Access
How and where to log in to your website.
- Do access the admin area of your website add “/wp-admin/” to the end of the URL for your website.
- For example if your website is i9design.com, you would enter: i9design.com/wp-admin/
- If you know your login and password, you can dive right into the admin control panel.
- If you forgot your password, you can reset your password using the “Lost your password” link and entering in your email address.
 Edit A Page
 Edit A Page
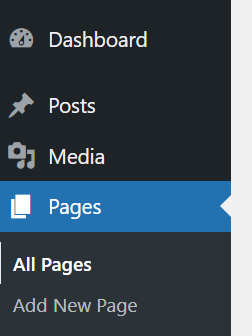
Loading a webpage to edit.
- Login to your WordPress website.
- From the Dashboard, you will find a list of your website’s Pages, under Pages.
- Click on the page you wish to edit.

Changing Text
Making Simple Text Updates
 To edit a section of text, simply click on the text box in the layout editor on your screen.
- Please note that copy and pasting in text from other applications such as Google Docs, or Office my bring in additional unwanted formatting into the web HTML.
- Best practice is to paste in text using Ctrl + Shift + V (Cmd + Shift + V on Mac). This will paste plain text, and remove the formatting for you.
- Once you are done, click on the blue SAVE button at the bottom right of the editing window.
 To edit a section of text, simply click on the text box in the layout editor on your screen.
Saving your page changes
Publishing your changes Live to your website.
- For any layout, text, or image updates, you must click the blue UPDATE button at the top right of the Page Edit page to complete saving your changes to the web.
- Note that you can roll back to any previous revision for a webpage, so know that any changes you make can be undone if needed.
Layout based image size
The image above is a sample of a full width layout.
The image on the left is a sample of a 1/2 page layout.
For these examples, we would use a pixel width of 2000 pixels for the above image, and 1,100 pixels for the image to the left. See the table below for a list of ideal image sizes.
Image Size Matters
Learn to select the correct image size based on where an image is used.
| Image Width in Page Layout | 1/4 Width | 1/3 Width | 1/2 Width | Full Width |
| Best Image Size (Width) | 700 px | 800 px | 1100 px | 2000 px |
Changing Images in the editor
There are 3 primary layouts we use when building pages. Each has a slightly different way of swaping images.
We will outline all 3 below.
Image Elements

Image elements are the most straight forward. If you see an image element in your layout, simply click on it to edit it.
Then follow the steps below to complete your edit.
Color Sections

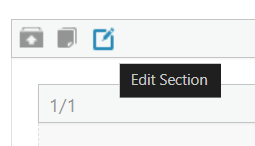 Color Sections are often used for full-width page banners. If you see a color section in your layout, hover over it till you see the Edit Section icon apear.
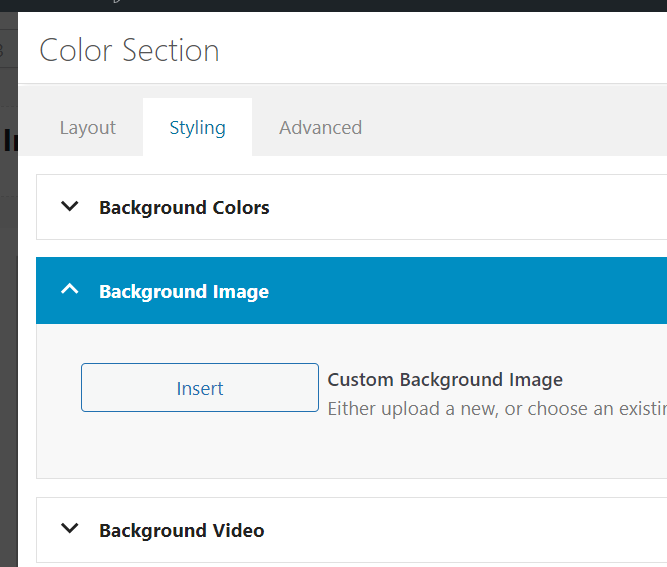 You will find the place to swap out the background image under Styling > Background Image > Insert
Then follow the steps below to complete your edit.
Grid Rows

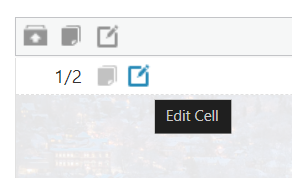 Grid Rows are used for grid like layouts, often with 1/2 image 1/2 text columns on the page.
To edit the background image in a grid row cell, hover over the cell till you see the Edit Cell icon appear.
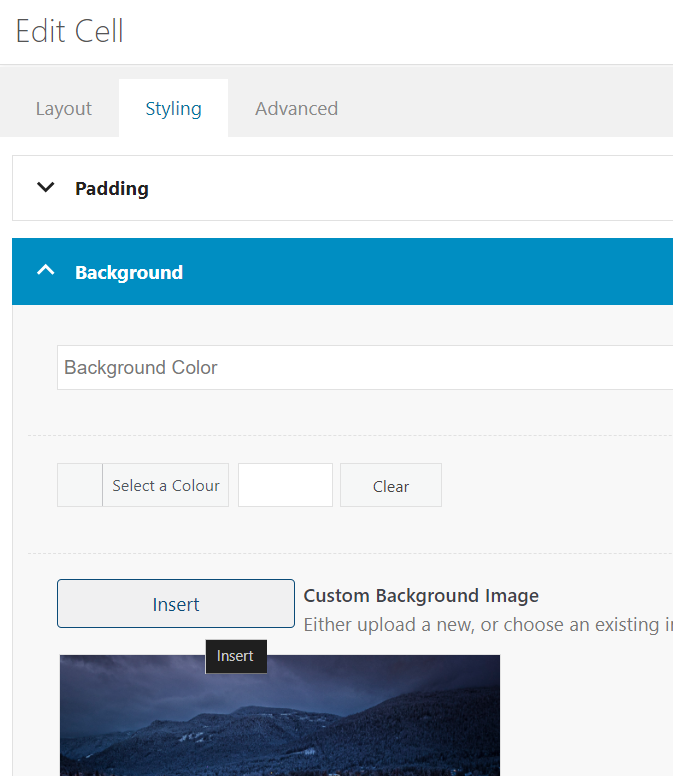 You will find the place to swap out the background image under Styling > Background > Insert
Then follow the steps below to complete your edit.
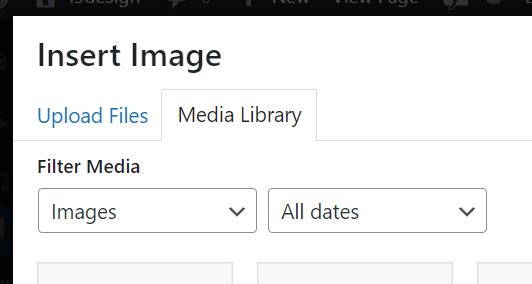
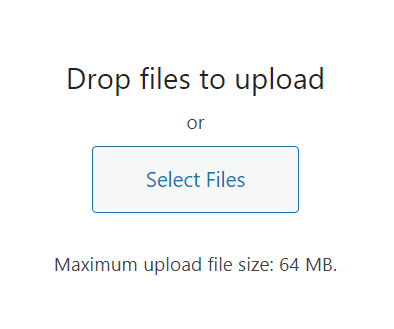
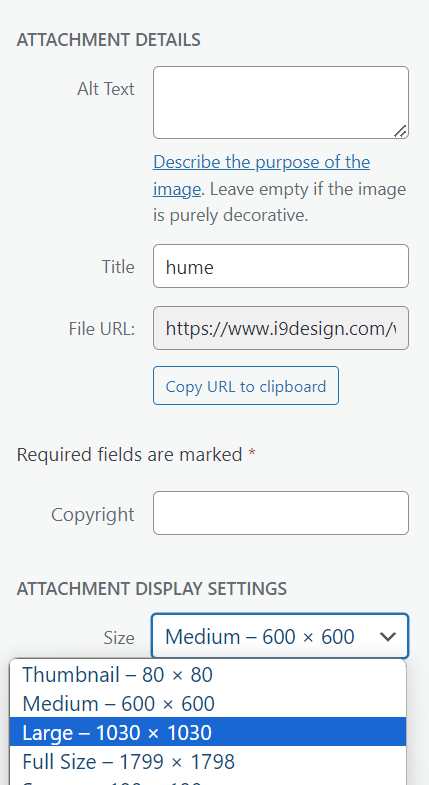
Uploading Images
Final steps to uploading images + selecting the correct size.
Click on Upload Files
Click on Select Files
Select the Image Size under ATTACHMENT DISPLAY SETTINGS that best corresponds to the table of images relative to page layout from above. For example, this selection of Large ( 1030 x 1030 pixels ) would work well for a 1/2 page layout.
Click on Insert into Page
Then Save, then Update ( see top of page for details on these steps. )